
In the previous blog, you learned how to install and set up the salesforce DevOps Center. This blog will focus on how to configure the Salesforce DevOps Center. In this blog, we will explain how to configure the Salesforce DevOps Center effectively.
Setting up a GitHub project repository:
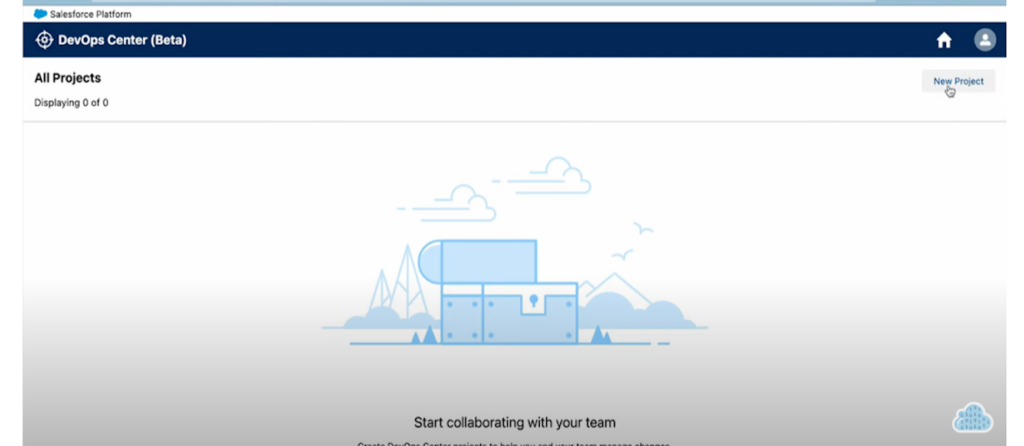
A GitHub repository serves as a central repository for all files related to a project, including codes, text, and images. For each DevOps Center project, a repository is needed to keep track of changes made during the project. The repository acts as the team’s authoritative source for managing modifications made to the project. To create a new project, click the “New Project” button.
You will be prompted to connect DevOps Center with GitHub, the only version control system currently supported. Provide your GitHub credentials and authorize the connection. Once authorized, you will see a message confirming the successful connection to GitHub, and you can then proceed to create your new project.

Create a new project:
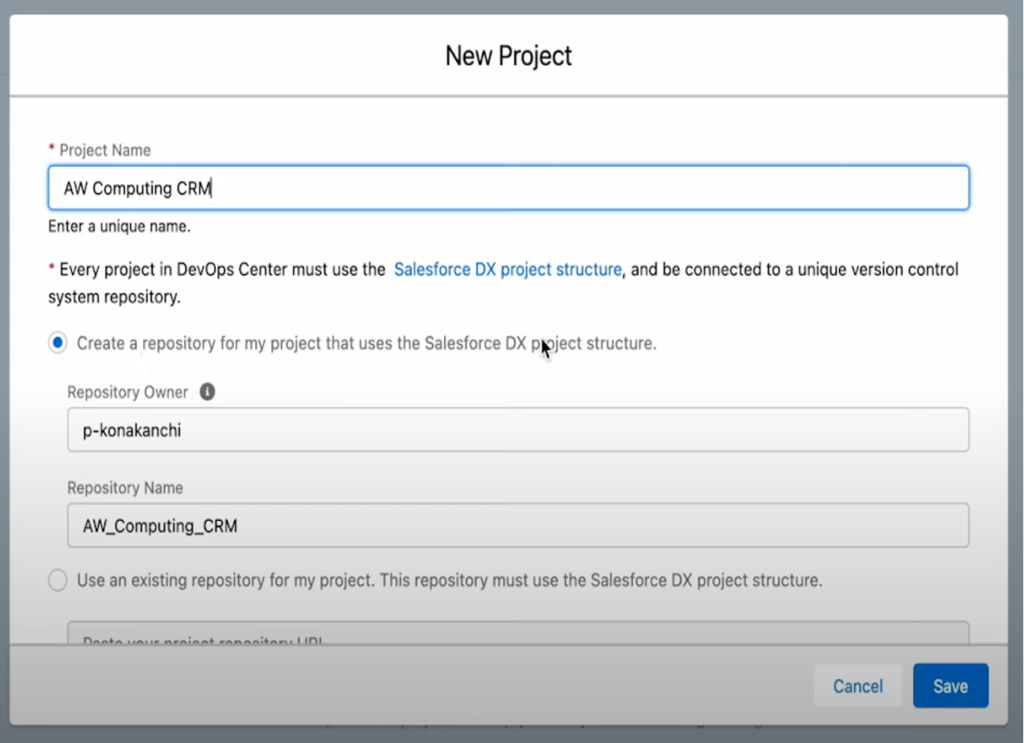
In order to create a new project, you will need to specify the details of the project. If you are setting up the project for the first time, choose the option “Create a repository for my project that uses the salesforce DX project structure”. Alternatively, if you already have a GitHub repository for the project, choose “Use an existing repository for my project” and click the save button.
Connect a release environment:
To continue, you need to connect a release environment, which is simply a production organization, and then connect it to the rest of the environments to complete the pipeline.
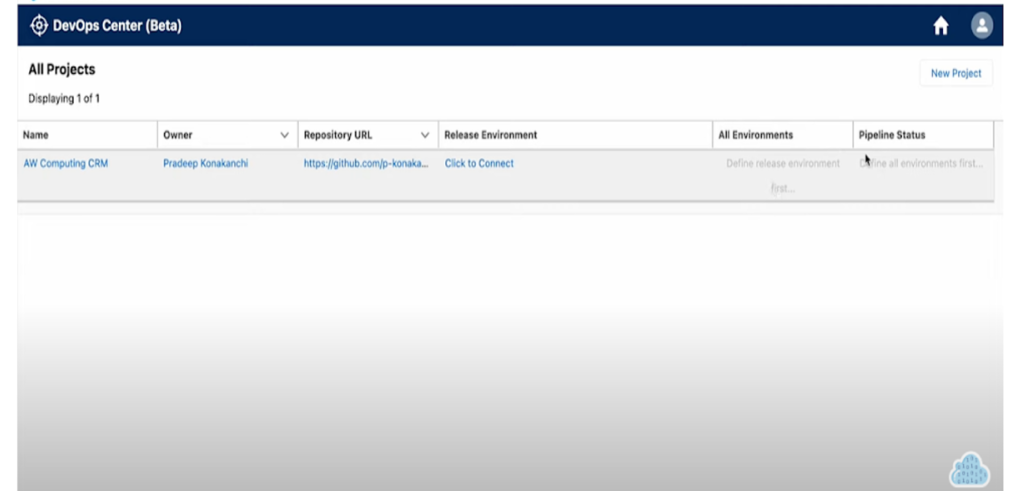
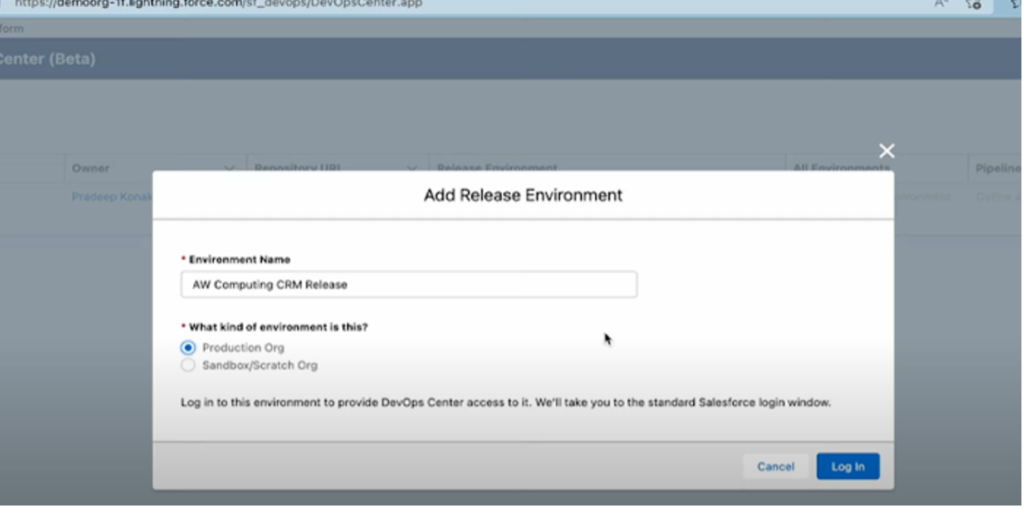
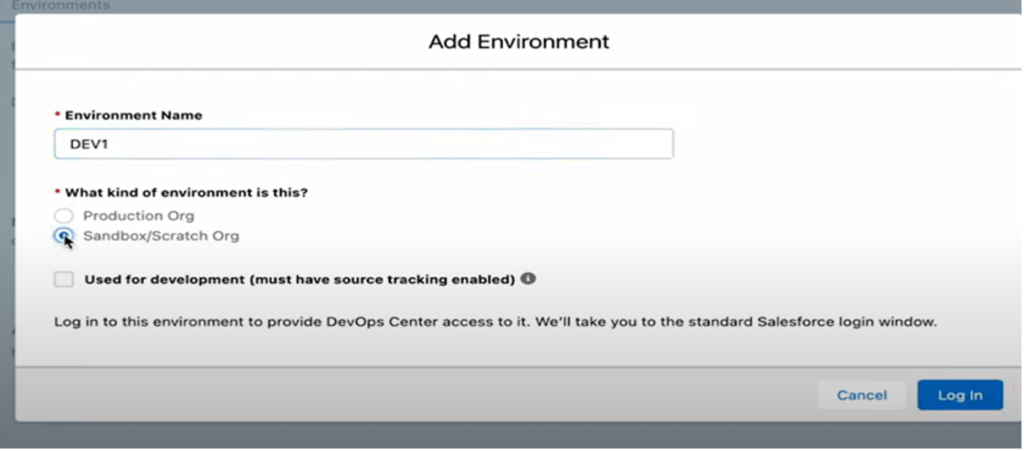
Select “release environment” to add a “release environment,” where you will be prompted to specify the type of environment it is. Choose the appropriate environment for your project and click login, which goes from the DevOps center to production.
Click “all environments” and you will be taken to the “Settings” tab. Under that tab, you will see the production and additional environments that have been added.
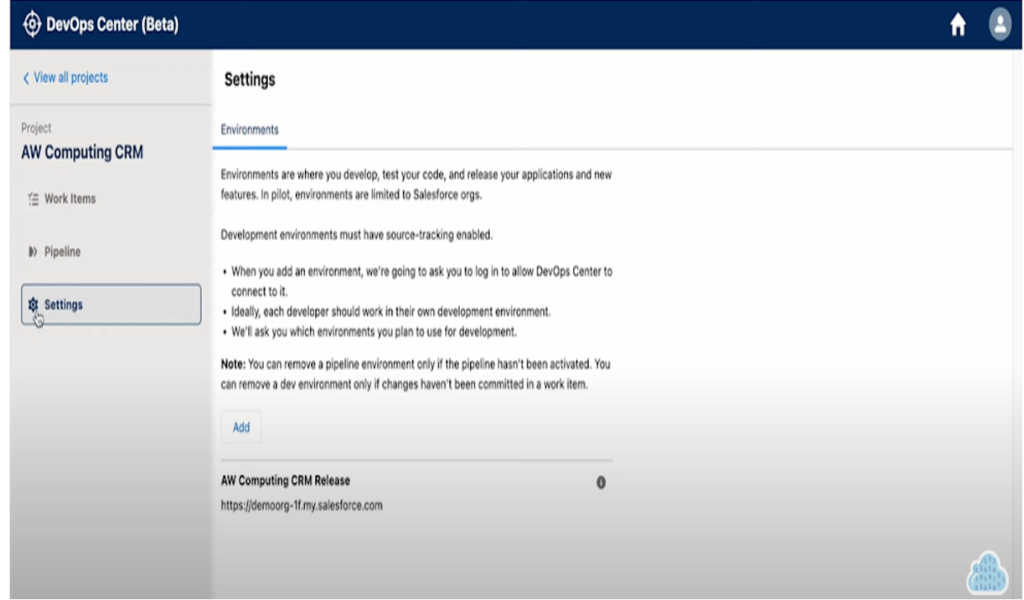
Under the “environments” section, click “add.” You will be asked to specify the type of environment. Select the suitable environment for your project and click “login”. This will prompt your production environment credentials. Log in to the sandbox and your Dev1 environment will be added to the DevOps Center. Repeat these steps to add additional environments for other developers in your organization, as each of them will have its own sandbox.
Create a UAT environment:
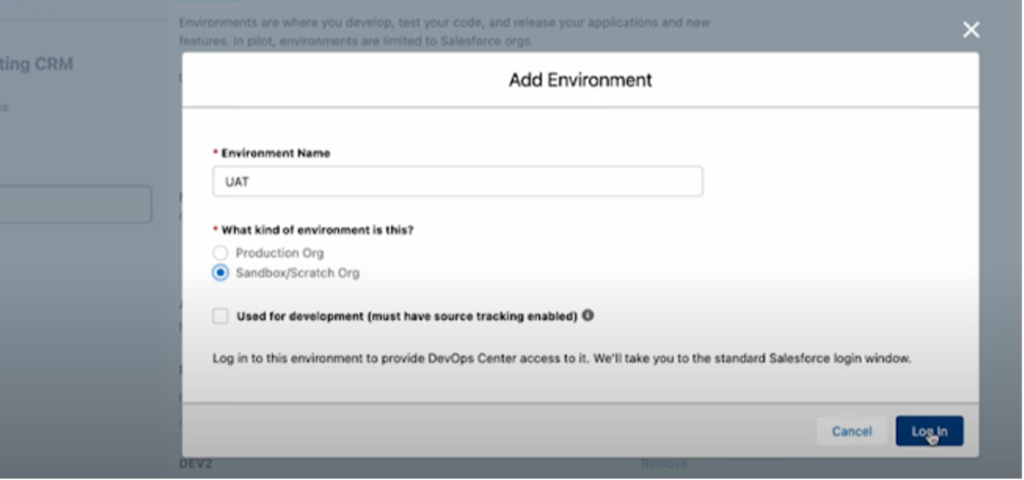
Click “Add” again to create a UAT environment for testing purposes. Your testing team will test all changes before they are pushed to production. To connect to this UAT environment, click “login” and enter your UAT credentials. The UAT environment is now connected.
Setting up the branch name for the UAT environment:
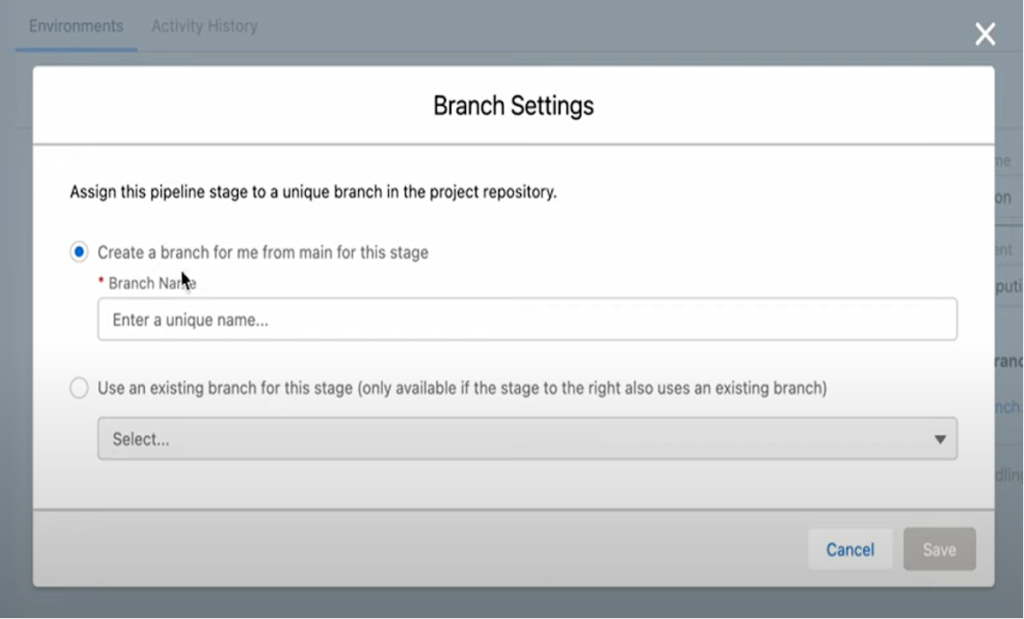
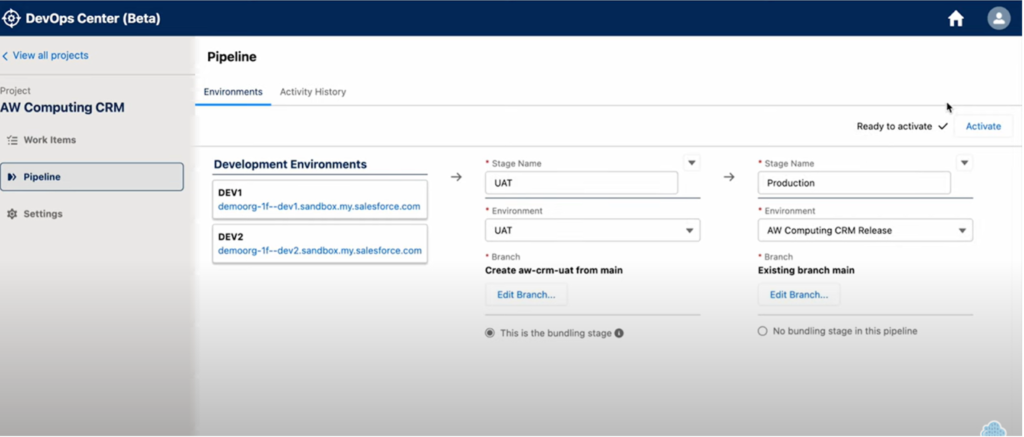
In order to activate the pipeline, you need to select the UAT environment and specify the branch. You can do this by clicking on the designated branch button and then deciding if you want to create a new branch or use an existing one from the repository.
Here you can see the pipeline is ready for activation, and the “ready-to-activate button” is enabled.
How do configure environments for Pipeline?
A minimum of one final release environment and one development environment is necessary to build a strong pipeline. It is recommended to have at least two to three test stages along with the development and production stages. You can use a pipeline template to streamline the process, which typically involves the following steps:
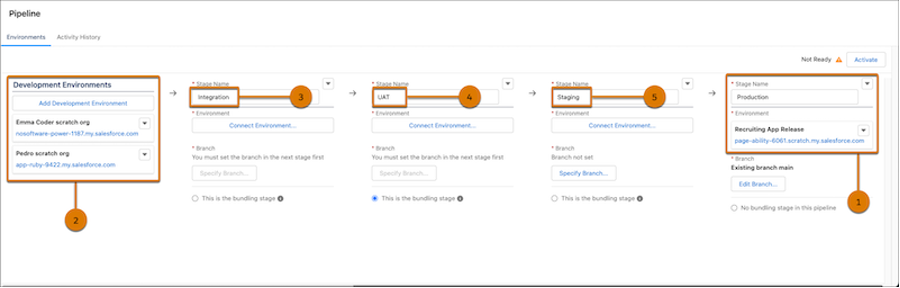
Integration: This is the first test stage after development, where all changes from various development environments are brought together for testing in a combined environment. Conflicts can be identified and resolved here.
UAT: This stage can occur one or more times between the integration and staging stages and is used for additional testing, including by business stakeholders. This is often referred to as “user acceptance testing” (UAT).
Staging: This is the last test stage before the changes are promoted to production. It is used for final validation or staging.
Production (Release): This is the final destination for the changes, as well as the live Salesforce instance.
How to create and assign Work items?
A work item in a DevOps center is a specific task or project that is assigned to a single developer within the “Work Items” tab. To create a Work Item, click on “New Work Item” and enter the necessary details. If you want to create a “Custom Object”, you’ll need to provide a description and assign it to a developer on your team. Once you’ve done that, click on “Save” to create and save the “work item.” The developer can then log into DevOps Center and start working on it.
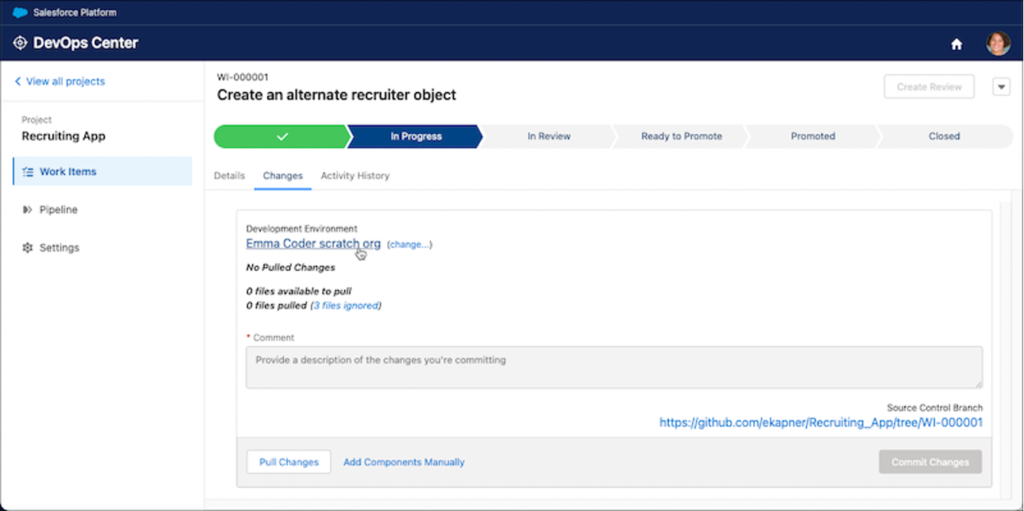
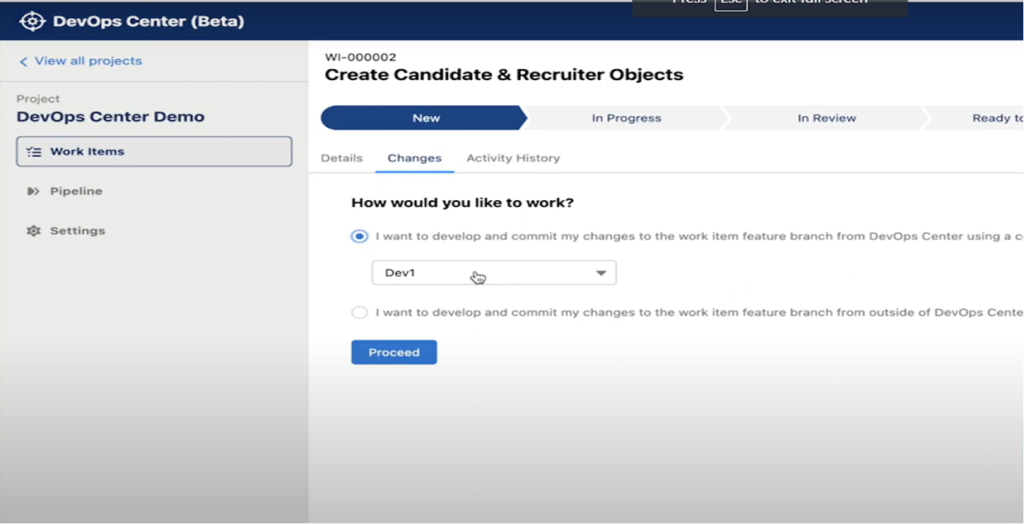
In the details tab, first, click its ID to open it. Then, select “I Want to Develop and Commit My Changes to the Work Item Feature Branch from DevOps Center Using a Connected Development Environment” and choose the development environment you want to use from the list. If it’s not listed, speak to your team manager or Salesforce administrator to have it added. After you click “Proceed”, check the Details tab for the work item’s description. If the work item isn’t assigned, assign it to yourself.
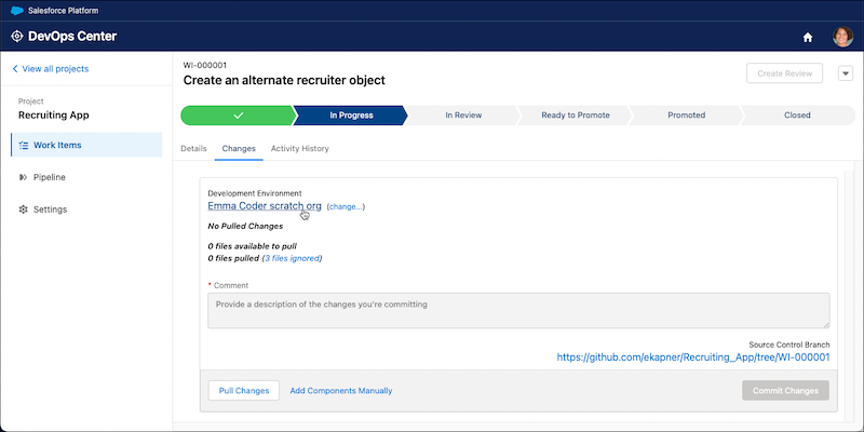
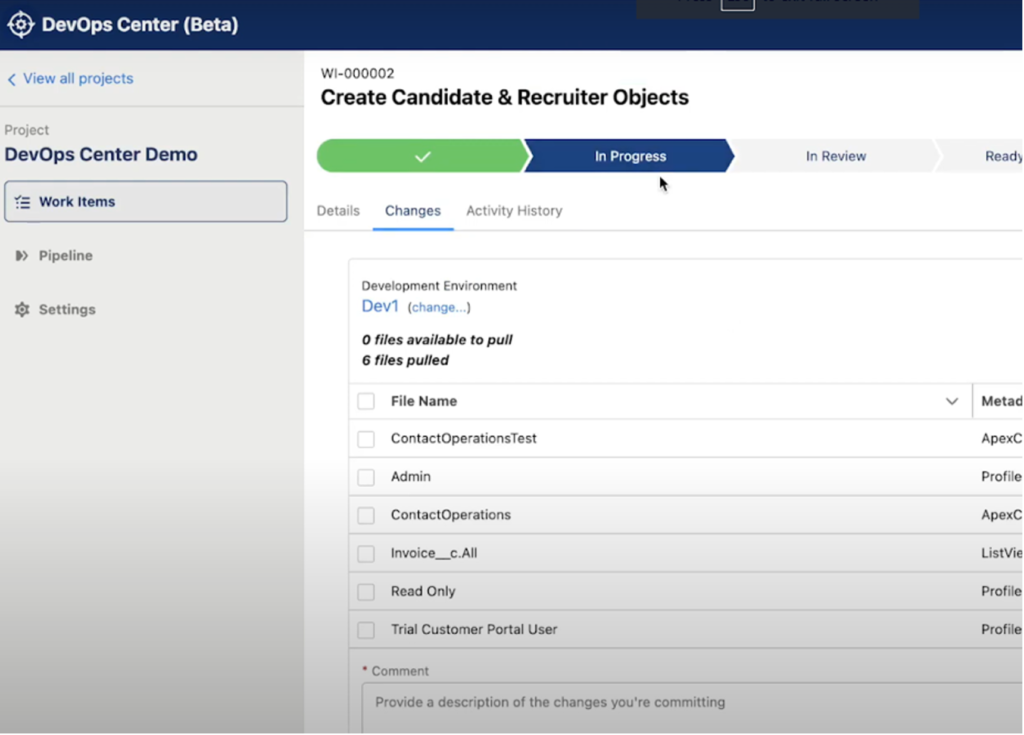
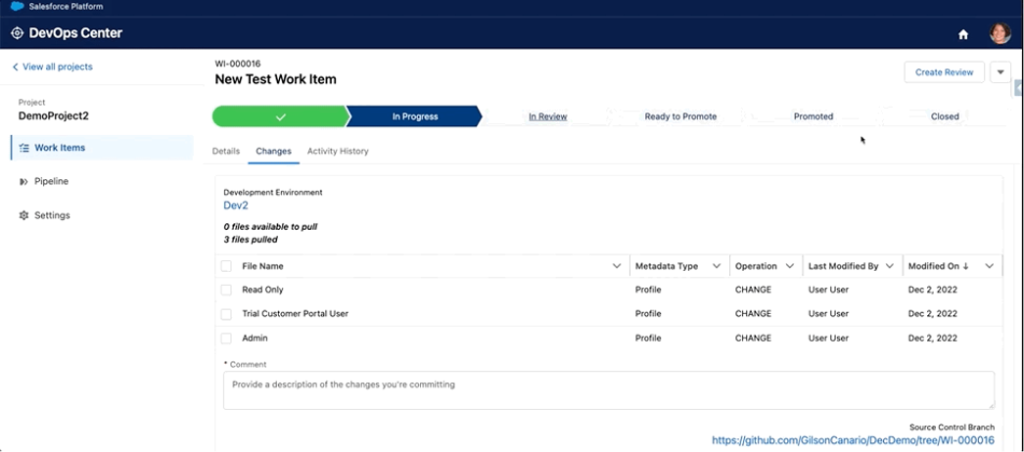
To access the development environment in the Changes tab, first, click on its nickname. If you still need to sign in to DevOps Center for this environment, do so and then click on the environment’s nickname again. Once you’re done with your development tasks, retrieve the changes made in the environment.
To associate a work item with your development work, either create a new one or select an existing one.
Choose the method for creating the feature branch. To have DevOps Center create the branch, click on the work item ID, select the option to “Develop and Commit Changes to the Work Item Feature Branch From Outside of DevOps Center,” then click Proceed.
By clicking on “Proceed”, a new branch will be created in your GitHub repository. You will receive a message indicating that the branch has been successfully created, along with the name of the branch. And, you will notice that the status has been updated to “In Progress” and under the “Changes” section, you will be able to observe the modifications that are currently taking place within your organization.
To view the branch, go to the bottom right of your page on Github, where you’ll see “github.com,” followed by your Github username and the name of the repository. Then, look for the “repository tree” and the branch name. If you click on the URL, it will take you to the branches that were just created, which are main, UAT, and the newly created “feature branch.”

How does DevOps Center work?
DevOps Center allows teams to see the alterations in their development pipelines and move them from one stage to the next with simple clicks. The changes made in sandboxes are captured and displayed in a central interface, where teams can pick and choose which changes to advance after review to ensure compliance with governance regulations.
Conclusion
Salesforce DevOps Center is a valuable tool for organizations looking to optimize their custom application development and deployment processes on the Salesforce platform and to improve the speed, quality, and efficiency of their development efforts.